
Essential Tools for Installing Engineered Wood and Vinyl Flooring
As a homeowner tackling a DIY project or a professional wanting to refresh your knowledge on the basics, the right flooring equipment can truly enhance your outcomes when it comes to setting up engineered wood and vinyl floors. It’s more than just placing planks and crossing your fingers for luck. It involves accuracy, precision, and a touch of patience. Are you prepared to step up your flooring expertise? Let’s explore the tools needed for achieving flawless results.
Measuring Tape and Spirit Level: Setting the Foundations
Ensuring you have a high-quality measuring tape is crucial for measurements – opt for a 5-metre tape for versatility in measuring longer planks effortlessly. Additionally, having a spirit level is key to achieving success in your project. For engineered wood and vinyl flooring, it’s essential to have a level subfloor to avoid any unevenness that could result in an unprofessional appearance of the floor. Investing in a 600mm spirit level can greatly reduce the time and frustration spent on corrections later on.
Remember this tip: it’s always a good idea to measure twice before making any cuts when working on a project! Taking that minute to double-check your measurements can save you from a whole day of costly errors.
Jigsaw and Mitre Saw: Precision Cutting Tools
Every room you work in is unique in its layout and design details; therefore, it is crucial to make precise cuts when dealing with various shapes and corners that may be challenging to cut around, such as radiator pipes—using a jigsaw can be very helpful in such situations. For making straight cuts effortlessly, a mitre saw would come in handy, making your tasks simpler and faster. When selecting a jigsaw, consider looking for one with variable speeds and a base plate that can be adjusted for cutting at angles to suit different requirements. Similarly, for the mitre saw, it’s beneficial to have a laser guide included to ensure precision cutting and sharp edges throughout your projects.
Here’s a tip for you: when you’re setting up luxury vinyl (SPC), make sure to use a fine-tooth blade to prevent any chipping or splintering issues.
Pull Bar and Spacers: Keeping Your Floor Tightly Aligned
Floor gaps can be a hassle as they not only ruin the look but also impact how long your floor lasts in good condition. Using a pull bar will help snugly connect planks without causing any damage to the edges. Additionally, spacers play a crucial role in keeping a uniform expansion gap between the floor and wall to prevent any buckling issues.
Pro tip: place spacers evenly around the room to create an expansion gap and don’t forget to take them out once the installation is finished!
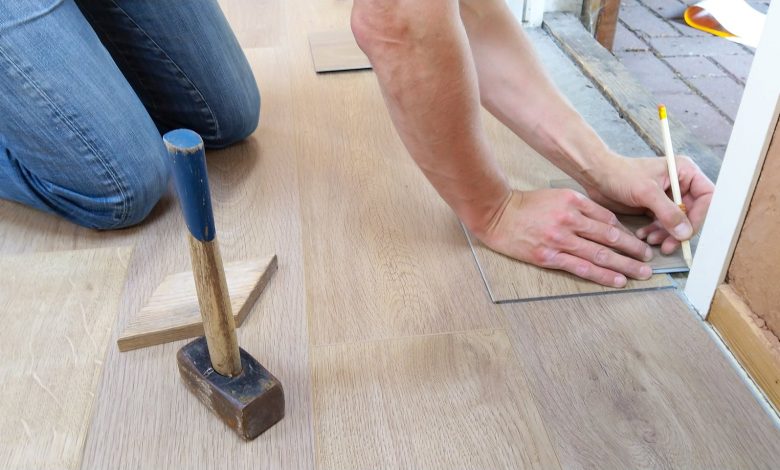
Flooring Mallet and Tapping Block: Gentle But Firm
When installing those interlocking planks in place, avoid using a standard hammer; there’s a risk of denting the plank surface if you slip up! Opt for a rubber mallet instead—it’s sturdy enough to lock the boards securely but gentle enough to prevent any damage. To ensure an even force distribution and prevent any chipping on the edges of your planks’ tongue or groove sections, use a tapping block alongside the mallet.
Here’s a tip for you: make sure to hold the tapping block at an angle when working on tighter joins to avoid causing any damage to the plank’s edges!
Handsaw: Your Go-To for Detailed Trimming
When it comes to making cuts around door frames and skirting boards, a fine-tooth handsaw is the tool you need on your side. In case you’re looking to trim door casings, opt for a flush-cut saw. The goal is achieving those fits that give off the illusion that the wooden planks were destined to be there all along.
A helpful tip is to make sure your door frames are a bit taller than your flooring to account for any expansion.
Multi-Tool: The Unsung Hero of Flooring Installs
If you’ve never had the chance to try out a multi-tool yet, you’re in for an experience! Thanks to its variety of attachments that can handle tasks ranging from cutting to sanding and even scraping off adhesive, it’s fantastic for making precise cuts in tight spaces such as around pipes or corners where a regular saw can’t reach.
Here’s a tip for you: to make notches without damaging the surrounding wood or vinyl, try using a plunge-cut blade attachment.
Moisture Meter: Checking Subfloor Conditions
When it comes to installing flooring, avoiding potential issues down the line with your new floor installation (such as on concrete or plywood subfloors) is crucial. Make sure you have a good moisture meter on hand to check the moisture content of your subfloor, which should ideally be between 8 to 12 per cent for wood flooring applications, ensuring a successful job in the end.
Remember, it’s a good idea to check different areas around the room when testing for moisture levels since they can differ quite a bit from spot to spot.
Knee Pads: Protect Yourself, Not Just the Floor
Setting up a floor can be quite a task that requires sturdy knees to handle it all with ease and comfort in mind! Make sure to equip yourself with top-notch knee pads when tackling a sizeable area, as they not only safeguard your joints but also provide the necessary comfort for better speed and efficiency in your work.
Pro Tip: to enhance your comfort during extended installations, opt for knee pads with gel padding!
Utility Knife: For Vinyl and Trimming Edges
You’ll need a utility knife to cut vinyl planks and trim underlay or vapour barriers effectively, so find one with a retractable blade and a comfortable grip. Make sure to have extra blades handy, since using dull ones can lead to messy cuts that you’d want to avoid.
Here’s a helpful tip for you: instead of making a single deep cut right away when scoring something with a knife or tool, try making light and repeated scores instead. This method is safer and helps achieve a cleaner finish in the end.
Adhesive Trowel (for Stick-Down Vinyl): Spreading Made Simple
When setting up stick-on vinyl flooring, it’s important to have a notched adhesive trowel handy. This tool helps in spreading the glue to avoid bubbles and ensure proper adhesion. Opt for a trowel with V-shaped notches when working with LVT and make sure to follow the manufacturer’s guidelines on notch size.
Pro Tip: for a vinyl application technique, allow the adhesive to sit for a few minutes after spreading it before applying the vinyl to prevent slipping and ensure a more secure bond.
Closing Remarks: Tools Mark the Start
Getting the right tools is a significant part of the task ahead of you; patience and precision make up the rest of it. When it comes to engineered wood and vinyl floors for your home or project, doing it properly will reap benefits in the long run.
Best wishes for your flooring project. Always keep in mind the old saying: double-check your measurements before making any cuts!