How to Use a Caulking Gun: a Guide
A caulking gun is a versatile tool that is commonly used for sealing gaps and cracks in various surfaces. Whether you are a DIY enthusiast or a professional, knowing how to use a caulking gun properly is essential. In this guide, we will take you through the step-by-step process of using a caulking gun effectively.
Selecting the Right Caulking Gun
Before you begin, it is important to ensure that you have the right caulking gun for the job. There are different types of caulking guns available, including manual and pneumatic ones. Manual caulking guns are the most common and are suitable for most applications. Pneumatic caulking guns are powered by compressed air and are ideal for larger projects or heavy-duty use. Choose a caulking gun that feels comfortable in your hand and is compatible with the type of caulk you will be using.
Preparing the Surface
Before applying caulk, it is crucial to prepare the surface properly. Start by cleaning the area with a mild detergent to remove any dirt, dust, or grease. Use a scraper or putty knife to remove any old caulk or loose material. For best results, ensure that the surface is dry before proceeding.
Loading the Caulking Gun
To load the caulking gun, first, remove the nozzle or cap from the tube of caulk. Then, cut off the tip of the caulk tube at a 45-degree angle using a utility knife. The size of the opening will depend on the size of the gap you are filling. Insert the caulk tube into the gun, ensuring that the plunger is at the back of the tube. Squeeze the trigger of the caulking gun until the plunger makes contact with the caulk tube.
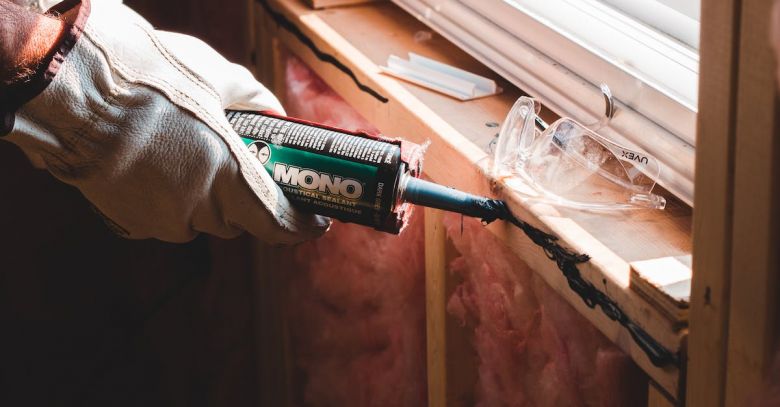
Applying the Caulk
Now that your caulking gun is loaded and ready, it’s time to apply the caulk. Hold the caulking gun at a 45-degree angle to the surface, with the nozzle touching the gap or crack you want to fill. Slowly squeeze the trigger, applying a steady and even amount of pressure. Move the caulking gun along the gap, maintaining a consistent speed and pressure. Release the trigger before lifting the caulking gun away to prevent excess caulk from oozing out.
Smoothing and Finishing
Once you have applied the caulk, it’s essential to smooth and finish it for a professional-looking result. Dip your finger in a solution of water and dish soap or use a caulk smoothing tool to gently glide over the caulk, smoothing out any uneven areas or excess caulk. Wipe away any excess caulk with a damp cloth or sponge. Allow the caulk to dry according to the manufacturer’s instructions before painting or exposing it to water.
Cleaning and Storing the Caulking Gun
After you have finished using the caulking gun, it is important to clean it thoroughly to prevent the caulk from hardening inside. Remove any remaining caulk from the gun by pulling back the plunger and wiping it off with a cloth. Use a caulk remover or solvent to clean any dried caulk from the gun. Once clean, store your caulking gun in a cool and dry place, away from direct sunlight and extreme temperatures.
In conclusion, using a caulking gun is a straightforward process that requires proper preparation, loading, application, and finishing. By following these steps, you can achieve professional results and ensure the longevity of your caulked surfaces. Remember to select the right caulking gun for the job, prepare the surface adequately, and clean and store the gun properly after use. With practice, you will become proficient in using a caulking gun and be able to tackle a wide range of sealing and caulking projects with ease.